
The Proposal Editor User Interface
The P roposal ED itor ("PED") is a graphical editor that may be used to construct HST Phase II proposals ( .prop files). Instead of typing directly into an ASCII text file, PED allows you to enter data quickly and easily with specially designed forms and tables. You also get immediate syntax checking and feedback on illegal entries. To use PED, you must have a terminal or workstation which supports XWindows.
A new Phase II proposal may be created with PED, and existing proposals may be revised with PED. When proposals are saved in PED, a new .prop file is written to your directory.
PED is included in the Cycle 8 RPS2 software package (version 8.0). New users will find preparing a Phase II proposal much easier with PED. If you use PED, we welcome your comments and suggestions. (Send them to your Program Coordinator.)
PED and RPS2 contain the same syntax checking software used by the RPS2 Preprocessor. It checks the legality of all entries made in the proposal (e.g., spectral elements, apertures, special requirements and combinations thereof). Because there are many rules and combinations to be checked, PED sometimes takes a few seconds to react to an entry that is made. One might ask why the same syntax checking software is contained in both PED and RPS2. Since PED is not the only way to edit a proposal, RPS2 must perform the syntax checking if another editor is used instead of PED . Also, the Preprocessor creates intermediate files that are used by the other RPS2 subsystems. These files must be created by RPS2 if PED was not used. Therefore, RPS2 will run faster if the proposal was written with PED since RPS2 will not have to check the syntax or create the intermediate data files.
There are a few, relatively minor changes in PED for this cycle.
PED does not have the following (albeit desired) features for Cycle 8:
PED works optimally when all proposal editing is done within PED because it has much greater control over the entries you make. As mentioned above, however, there are a couple of instances when it is useful to switch temporarily to another editor.
As with all editors, caution must be exercised if you have more than one editor open on a file at one time. If changes are made in one editor, they do not automatically appear in the other. Furthermore, saving the wrong version can lead to lost data if a file is overwritten. It is strongly recommended, therefore, that you save your proposal in PED and exit PED completely before changing to another editor . (It is not necessary to exit RPS2.)
After using a regular text editor, you can read the proposal back into PED by choosing "Edit" from the RPS2 User Interface or by typing rps2-ped at the unix prompt (include the full path name if necessary). If you have made any typing errors outside of PED, PED may not be able to understand what you have entered:
To open PED from within RPS2, click on the "Edit" button on the RPS2 User Interface after selecting a proposal file.
If this is the very first time you are editing a proposal through RPS2 version 8.0, you will be prompted to select an editor -- PED or your default editor (e.g., emacs or vi). You can always switch editors later by choosing the "Configure Editor" option under the RPS2 "Configure" button.
If you do not have RPS2 open, you can still run PED by typing <path of installation>rps2-ped & at the unix prompt.
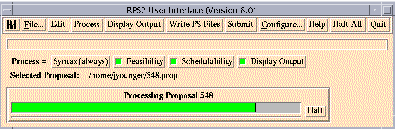
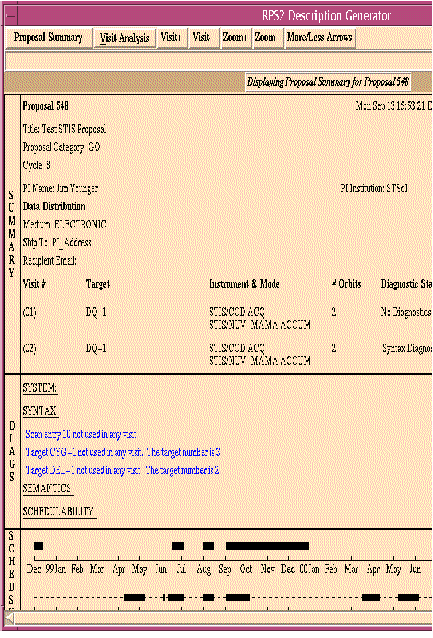
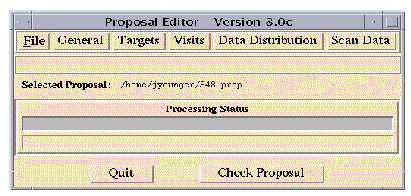
The Proposal Editor User Interface (as shown on the first page of this chapter) will appear on your screen. It looks similar to the RPS2 User Interface. By default, the proposal you have selected in RPS2 will be selected for editing in PED. Therefore, PED will immediately perform syntax checking on that proposal and provide a dialog box of any existing syntax diagnostics. This may take a minute or so to complete.
PED also immediately creates a backup file ( #.prop-ped_backup ) before you can make any changes to the proposal.
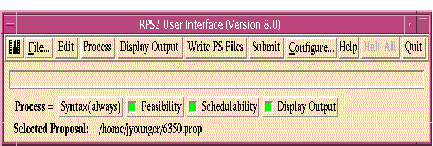
The following buttons appear across the top of the "Proposal Editor" user interface (see See Writing Your Proposal: How to use the Proposal Editor (PED) ):
Except for "File", each of the top row buttons corresponds to a unique section of the Phase II proposal file. Therefore, clicking on one of those last 5 buttons will bring up a particular editor screen in which the user enters or modifies data. A description of each button is given below.
There are also buttons at the bottom of the "Proposal Editor" user interface:

By design, the various PED screens are all structured in a very similar manner. The following information and tips are therefore relevant to most of the screens you will use:
1. Data can be typed directly into the highlighted entry boxes (blue on most systems). To enter data, position the mouse in the box and click once. A blinking cursor will appear. At this time, it is not possible to move between entry boxes using the Return or Tab keys; you must reposition the mouse and click once. If an entry box is darkened (grey on most systems), it means that it is not legal to enter data there due to other options or configurations you have chosen.
2. Any box that turns slightly darker when you position the mouse pointer over it can be clicked on to make a selection or bring up another list or data entry box.
3. Some entry screens contain " sliders ." To enter data, you can either type directly into the entry box or move the slider. To move the slider, place the mouse over the slider button and click and drag it in the desired direction.
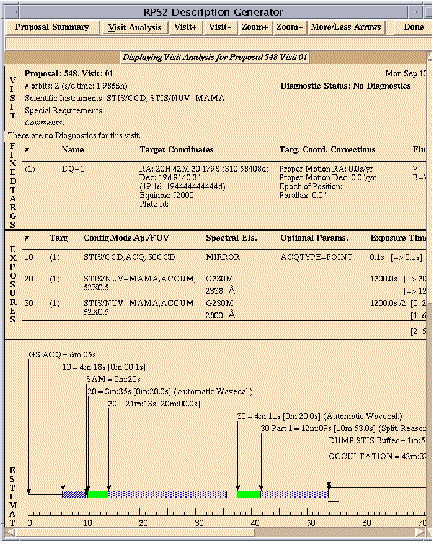
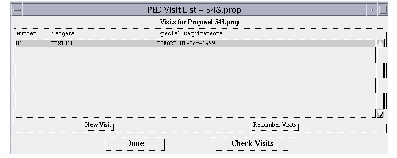
4. Many screens contain lists of certain items. For example, the Visit List is illustrated below:

The method used to work with these lists is as follows:
To add a new <item>, click the " New <item> " button below the list.
To renumber the <items>, click the " Renumber <item> " button below the list.
To edit an existing <item>, position the mouse over the appropriate <item>. The line will become highlighted. Click the left mouse button, and a pull-down menu will appear. Choose "Edit <item>". Alternatively, you can just double click on the item to edit it.
To copy an <item>, position the mouse over the appropriate <item>. The line will become highlighted. Click the left mouse button and choose "Copy <item> from the pull-down menu.
To delete an <item>, position the mouse over the <item> and click the left mouse button. Choose "Delete <item>" from the pull-down menu.
5. Most of the entry screens contain two boxes: " Done " and " Check <item> ", where "<item>" may be flux, optional parameter, target, exposure, visit, proposal, etc. Click on "Done" if you are finished entering data and want to close the screen without performing an immediate syntax check. Otherwise, choose "Check <item>" to perform a syntax check on the data in that screen. In this way, you choose whether to check entries in individual screens as you go (e.g, flux data, exposure) or check a whole target or visit at once. If problems are found, a new window will pop up with diagnostic messages.
6. Just as with RPS2 diagnostics, the messages are generally short, but longer explanations are available by clicking on the message of interest.
7. Much of the exposure-level data (e.g., instrument configuration, operating mode) is entered by selecting items from pop-up menus. These menus list both the available and unavailable options, as detailed in the Phase II Proposal Instructions . You can click on any of the available options (on the left side of the menu) to add them to your proposal. If you click on any of the unavailable options (on the grey, right side of the menu), text will appear at the bottom of the screen explaining why that option is not available.

The "File" button contains a pull-down menu (obtained by clicking on the button) of the following options:
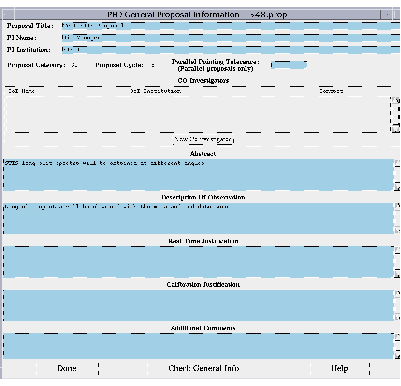
The "General" button brings up this PED General Proposal Information page:
In this screen, you can enter/edit the following portions of your template:
For GOs, this information will be already filled in from the Phase I proposal. However, GOs should review the text sections and update them as necessary. Note that unlike in previous cycles, the Proposal Category and the Proposal Cycle number (it should be 8) cannot be changed in the Proposal Editor.
The "Targets" button brings up the PED Targets List:
From this screen, you can enter a new target, modify, renumber or delete existing target(s), and check the syntax for all targets. Once you have targets entered, they will all be listed here. Refer to item 4 in See Important information pertaining to all the editor screens for information on how to edit the Target List.
When adding a "New Target", a menu will appear. Choose the type of target you wish to add:
The appropriate Target Editor page will appear. When you add a new target, a default target name will be entered automatically. Be sure to change that default name to the proper target name . Here is a sample target editor screen for a fixed target:

The "Visits" button brings up the PED Visit List:

This screen contains the existing visit(s), the target(s) used in each visit, and any visit-level special requirements. From this list, you can create a new visit, modify, renumber or delete existing visits, and check the syntax for all visits. Refer to item 4 in See Important information pertaining to all the editor screens for information on how to edit the Visit List.
When you add or modify a visit, the PED Visit Editor is brought up on your screen (see next section).
This page contains the following lists: visit-level special requirements and the individual exposures contained in the visits. You can add, delete or edit the special requirements or exposures. You can also renumber the exposures. Refer to item 4 in See Important information pertaining to all the editor screens for information on how to edit these lists. From this page, you can also copy or delete one or more exposures in the current visit. This page also contains areas to enter visit-level comments and "On Hold" comments.
When you add or modify an exposure, the PED Exposure Editor is brought up on your screen (see next section).

On this page, you enter all the exposure-level data such as Science Instrument, configuration, aperture, etc. This page also contains the following lists: exposure-level optional parameters and special requirements. Refer to item 4 in See Important information pertaining to all the editor screens for information on how to edit these lists. Each exposure has its own Exposure Editor page.
From this page you can also add, modify, or delete an exposure's optional parameters and comments.

The "Data Distribution" button brings up the PED Data Distribution editor:
On this screen, you can enter the following information:
Click on the boxes to make your selections. To check your entries, click on "Check Data Distribution." To close the screen, click on "Done."

The "Scan Data" button brings up the PED Scan Data List:

From this screen, you can add a new Scan (Dwell or Continuous), modify, renumber or delete existing Scans, and check the syntax for all Scans. Once you have Scans entered, they will all be listed on this screen. Refer to item 4 in See Important information pertaining to all the editor screens for information on how to edit the Scan Data List. Note that FGS Scans have been eliminated.
Here is a sample Scan Editor page:
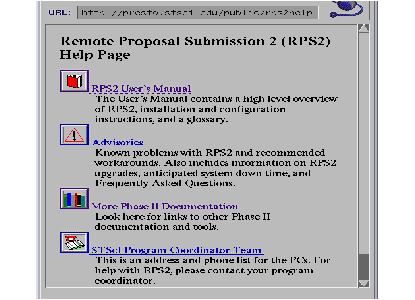
On-line help is available via the "Help" button on the RPS2 User Interface and on the Visit Editor, Exposure Editor, and Data Distribution pages. As described in See How to get help , clicking on this button will open a World Wide Web client which connects to the RPS2 Help Page at STScI. From this page, you can access up-to-date information and advisories about PED and RPS2.
If you need additional assistance, contact your Program Coordinator at any time.